What do you do with all the cool salvaged pieces you have been hoarding up? That’s what we’ve been asking ourselves as the pile of old doors and shutters threaten to take over our wood shop. Well we finally figured it out! We decided to use the pieces to cover a wall that had long been an eyesore at the shop.
You know how the creative process goes – you start with one idea that kinda evolves as you go. And sometimes it ends up looking completely different than you had imagined. That’s what happened here. Our original plan was to use all shutters and paint them the same color or shades of a color family (as you can see that didn’t happen!)
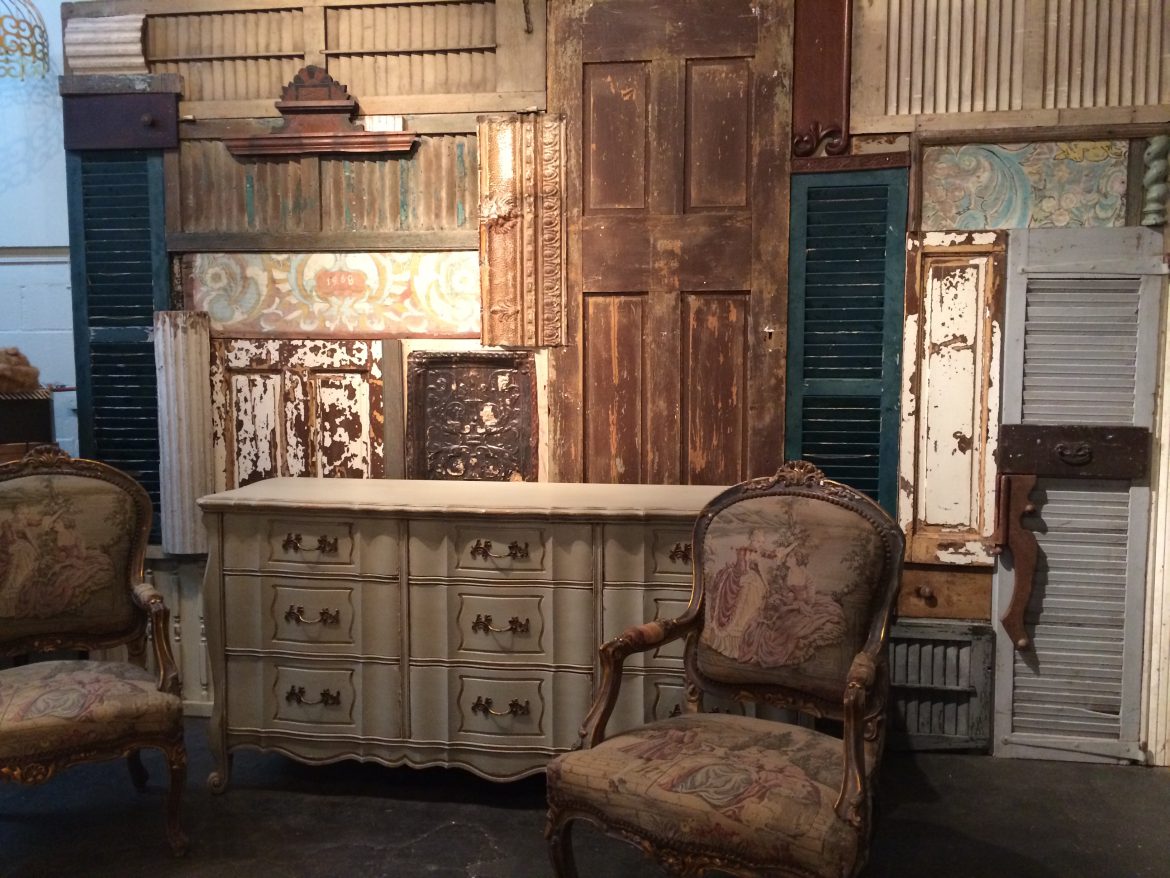
We began by dragging out the pieces that we wanted to use and marked the dimensions of the wall onto the floor. We decided that laying it out on the floor first would be the best plan and we are glad we did. It was like a jigsaw puzzle trying to fit the pieces together. As we worked we realized that we were really digging the way the original finishes looked together. We decided not to paint and leave all the great patina and texture of the old pieces.
What worked for us was placing the biggest pieces first and then filling in the smaller gaps. We moved things around until we liked the composition and then figured where we would need to make cuts. We decided not to make the cuts until we placed the large pieces on the wall – you never know what’s going to happen! In the end that was a good choice as we decide to make some changes with the width of the wall.
We prepped the wall with crossbeams and plywood. Then attached the larger pieces with screws. Using the nail gun for the smaller decorative pieces.
It was fun finding quirky small pieces to fill the gaps – like a metal hinge, tin pieces, door fronts, and column parts. At the end of the day we decided we wouldn’t mind spending more days building random walls.
It was a good day!